Commercial skylights bring many benefits, like natural light and ventilation. But they can leak, which can harm both roofs and interior walls. Fixing a leaky skylight in a commercial space needs different steps than for homes. This guide will show you nine easy do-it-yourself methods to repair the leak.
Following these steps, you can reduce damage to your roofing and interior finishes, keeping your solution strong and watertight. Whether you manage a small office or a large facility, knowing how to fix skylight leaks is key to maintaining your building. Join us as we explore practical techniques to protect your commercial property from skylight leaks.
The Commercial Roofing Skylight Basics
You might not notice it right away, especially since it rarely rains in Los Angeles, CA.
The first step in fixing a leaky skylight on your commercial roof is to identify the root cause of the leak.
But before diving into that, it’s important to understand the basic structure of a skylight. Here’s a quick overview:
A skylight is made up of three main parts:
-
Curb section – Usually a wooden frame about 6 inches tall, installed over the roof opening.
-
Lens (Polycarbonate) section – This sits on top of the curb and is secured by a metal frame and gasket.
-
Metal or plastic flashing – Wrapped around the curb, this flashing allows the roofing material to attach securely, creating a watertight seal.
Understanding these components will help you diagnose and fix the leak properly.
Capped Vs Capless Domed Commercial Skylights.
Industrial Skylights and Code Compliance
Industrial skylights must have caps according to regulations. If your skylight is missing a cap, consider replacing it. A capless skylight is not up to code. Fixing leaks in a capless skylight often provides only a temporary fix.
Fixing the Skylight Leak
Leaks can be tricky to locate and fix, so sometimes it’s best to hire a professional commercial roofer to inspect the problem. The most common causes of skylight leaks are the aging polycarbonate lens and deteriorated flashing.
If you do spot a visible gap or hole causing the leak, here’s how you can fix it yourself:
Safety First
Working on a roof can be dangerous. Falls, even from as low as six feet, can cause serious injury or death. Each year, there are reports of people, including firefighters, falling through skylights. Skylights can give a false sense of security—they’re not designed to support your weight.
Never sit, step, or walk on the skylight.
Step 1: Clean the Skylight
Use a wet rag to thoroughly clean the skylight frame and lens. This ensures the sealant will adhere properly and prevent future leaks.
Step 2: Apply Masking Tape
Once clean, apply masking tape all around the skylight to ensure clean, sharp edges when applying the sealant.
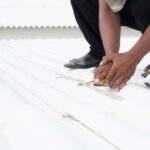
Step 3: Apply Silicone Sealant
Generously apply a coat of silicone sealant around the skylight frame and glass. Silicone sealants are highly effective for waterproofing.
Step 4: Embed Polyester Fleece
Press polyester fleece into the wet silicone sealant, covering both the glass and metal frame. This fleece reinforces the sealant and adds durability against leaks.
Step 5: Add a Second Silicone Coat
Apply a second, smooth layer of silicone sealant over the fleece, making sure the fleece is completely covered.
Step 6: Remove Masking Tape
Carefully peel off the masking tape to reveal clean edges around the skylight.
Step 7: Inspect After 24 Hours
Check your work after the sealant has dried (about 24 hours). Look for a smooth seal between the glass and frame. If leaks persist or gaps remain, apply a third coat of silicone sealant.
Step 8: Caulk Flashing Gaps
If you notice any gaps in the flashing, use commercial-grade caulking to seal them. Sikaflex caulking is a reliable choice we use at Central Roofing.